How Can I Keep Track of My Product Catalogue?
How Can I Keep Track of My Product Catalogue? Ok, any business that buys and sells products needs a well organised product catalogue, to keep track of the products you sell and to quickly answer basic questions such as:
- What products do we offer?
- What price do we sell them for?
- Who do we buy them from?
- How much do they cost us to buy?
- When did we last review the supplier/price for each product?
In this blog post we are going to look at how Core can be used to help organise your products into a well-structured catalogue. Including simple reporting to help track when you last reviewed your suppliers and pricing for each product, and to create a regular schedule for keeping these reviews up to date. We aim to complete the setup in under two hours.
Step 1 – Define the Content Types We Need (5 Mins)
For this example, we will need the following Content Types:
- Organisation
- Contact
- Product Category
- Product
- Product Review
Step 2 – Use the Existing Organisation Content Type (20 Mins)
Some of the Content Types are the same ones we created in an earlier blog post How Can I Manage the Customer Relations in My Business? Core by ESP (core-software.co.uk). If you already have these, this step will not be needed:
Organisation
- Name
- Main Contact (Select the name field from Contacts)
- Telephone
Contact
- Name
- Telephone
- Email Address
This is how it looks when completed:
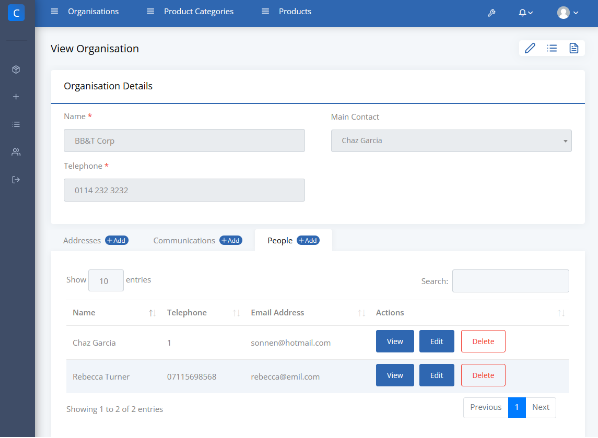
Content Type Example
For details see the documentation: Content Types & Fields
Step 3 – Create the Product & Product Category Content Types (15 Mins)
Product Category:
- Name
- Description

Core Content Type – View Product Category
Product
- Product Details
- Product Name
- Product Number
- Category
- Financial Details
- Cost Price
- Sell Price
- Tax Code
- Supplier Details
- Supplier
- Minimum Order Quantity
- Review Date
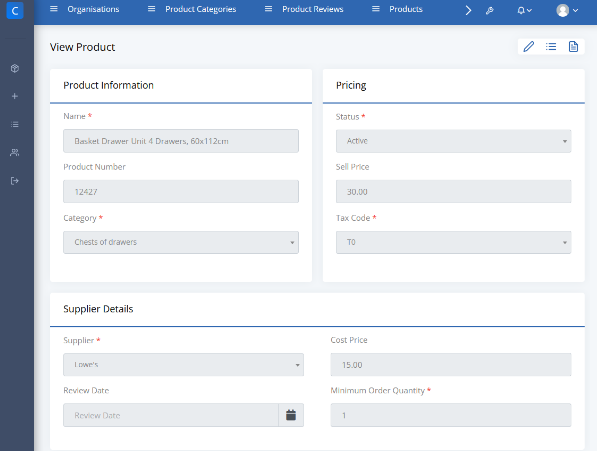
CORE Content Type – View Product Information
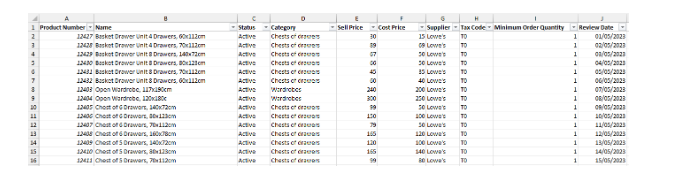
Step 4 – Import Your Product Data (5 Mins)
You can easily import your existing data directly from an Excel file. Just export the column headings from Core, copy/paste your product data into the relevant columns and import the file back into Core:
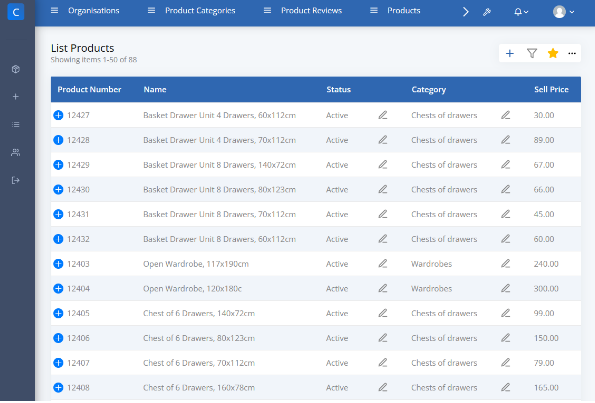
CORE Content Type – List Products
Step 5 – Create the Product Review Content Type (10 Mins)
This Content Type is to help us track our product reviews. It will be essential to bring the reporting to life. Making our product catalogue into an active component of our business, driving continuous improvement.
- Product
- Review Date
- Reviewed By (Drop Down List of Users)
- Outcome
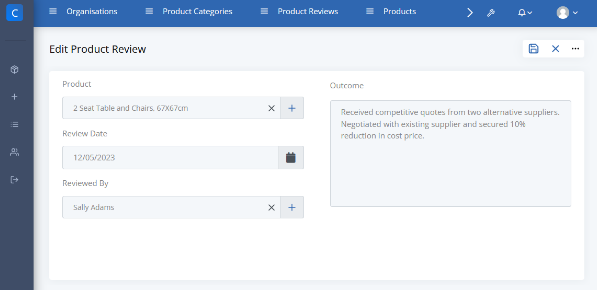
CORE Content Type – Edit Product View
Step 6 – Building a Review Schedule (20 Mins)
Now we have our Content Types created and our initial product data imported, we can start making our data interactive, using the reporting and alerting features of Core. The easiest place to start is by setting a review date for each product in your Excel file and then you can bulk upload them in one go:
Building a Review Schedule (20 Mins)
Next, we make a Content Query to find products due for review. In this case, we will select any products where the review date is in the next 14 days. You can easily adjust the frequency to suit your review cycle.
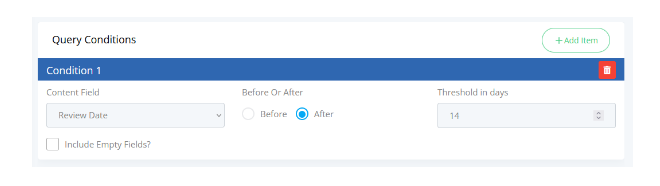
Building a Review Schedule (20 Mins)
The Content Query can now be used to create any combination of the following:
- Reports
- Dashboards
- Email Notifications
Step 7 – Create a Dashboard (10 Mins)
We create a dashboard just like we create any other Content Item:
- Go to the Dashboards list
- Click the new item button
- Choose a name for our Dashboard
- Click Save
Now we use the Dashboard Builder to add a Tile, linking to our Content Query:
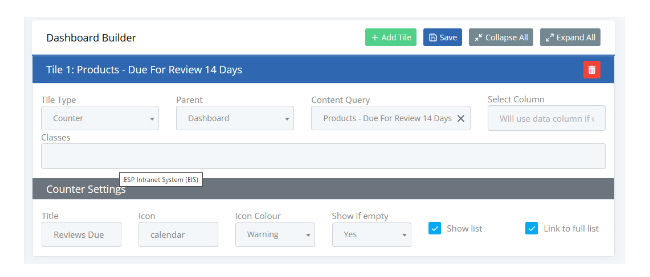
Create a Dashboard (10 Mins)
Save that and then we can view our new Dashboard:

Create a Dashboard (10 Mins)
If we want, we can make a similar query to show the overdue reviews and add that to our Dashboard, this time with a different icon and a bit of red to show the urgency:
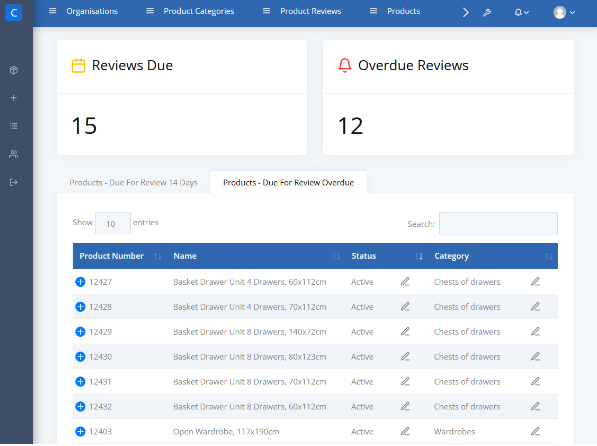
Example of CORE Dashboard
For more details see our documentation: Dashboards, Reports & Notifications
Step 8 – Create Alerts & Notifications (10 Mins)
If we want to go a step further and notify someone directly, we can do this as well. There is a lot of flexibility in this area depending on your needs. You might have one person (or team) working from the dashboard on a daily basis, but then schedule an email to a more senior manager once a week, for the really overdue ones.
Alerts are easy to set up and have several options:
- Alerts within the App
- Email Notifications
- Notification via Microsoft Teams
For details see the documentation: Dashboards, Reports & Notifications
Summary
You now have a well organised product catalogue. You can easily adapt it further to suit your individual needs. It comes with a reminder system to help you keep track of which products have been reviewed and which ones need attention. All of this was completed in less than two hours with Core’s easy to use interface.
Conclusion
Get in touch via our Contact Page if you have any more questions or would like to arrange a demo. You can browse our documentation here: Core Documentation Including our library of video examples, showing how easy it is to use: Video Library.