How Can I Restructure my Database?
In the last blog post, we looked at how to plan a new database. Especially, with regard to deciding what types of thing to track and the relationships between them. But what if you are coming late to the party?
In this post, we are going to look at what happens when we have made some initial choices, started to collect data in our database and now we have changed our mind and want to rearrange things.
Where We are Starting
We started off with an Excel spreadsheet that showed a simple list of all our Sales, with the following columns:
- Date
- Customer Name
- Customer Telephone
- Car Manufacturer
- Car Model
- Car Registration
- Cost Price
- Sale Price
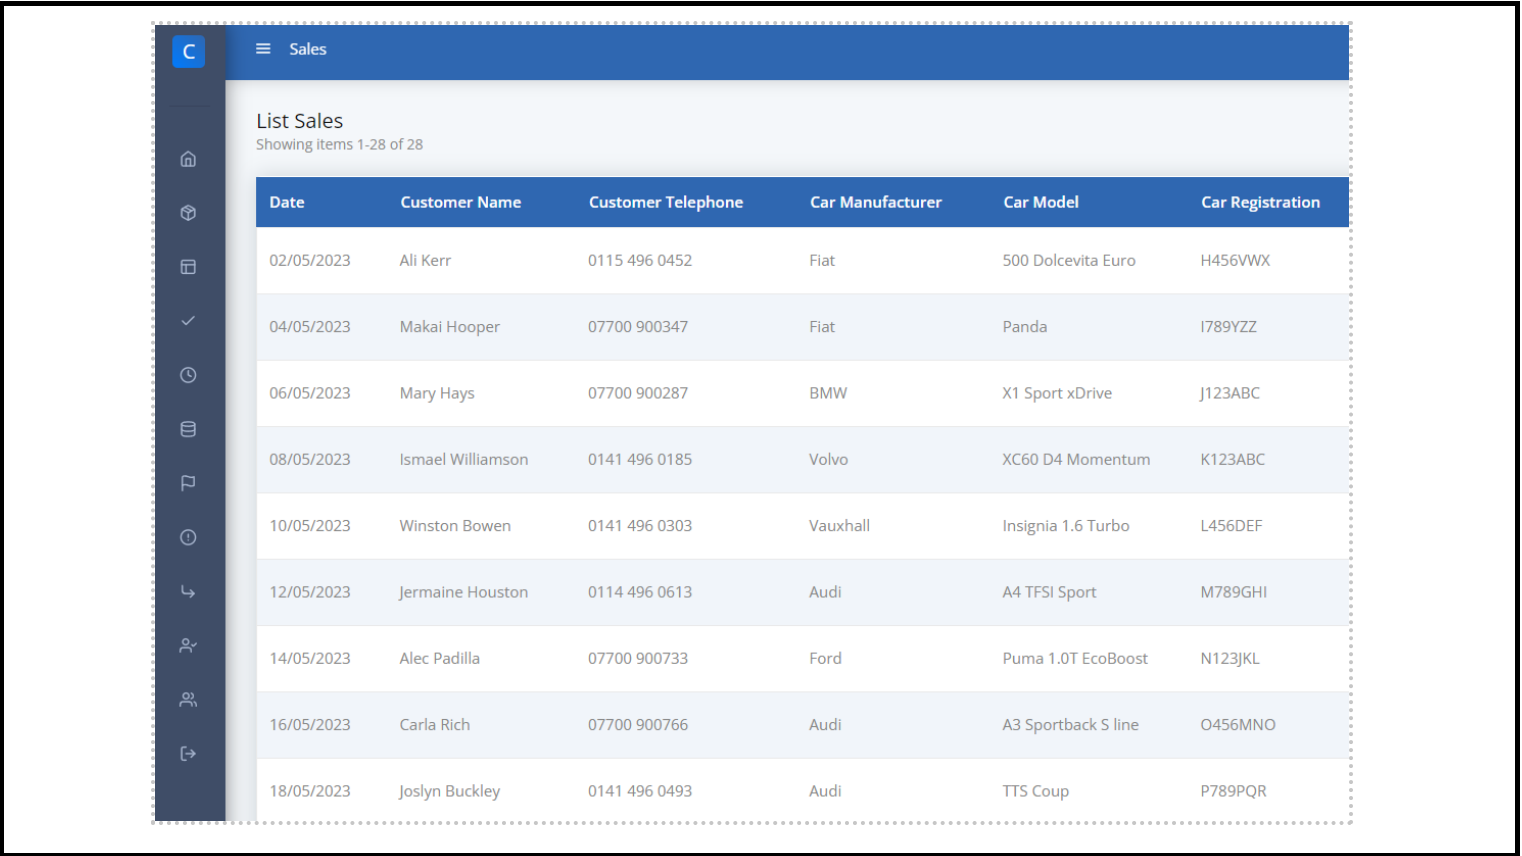
We created a Content Type in Core and used the import from Excel feature to upload our historic data:
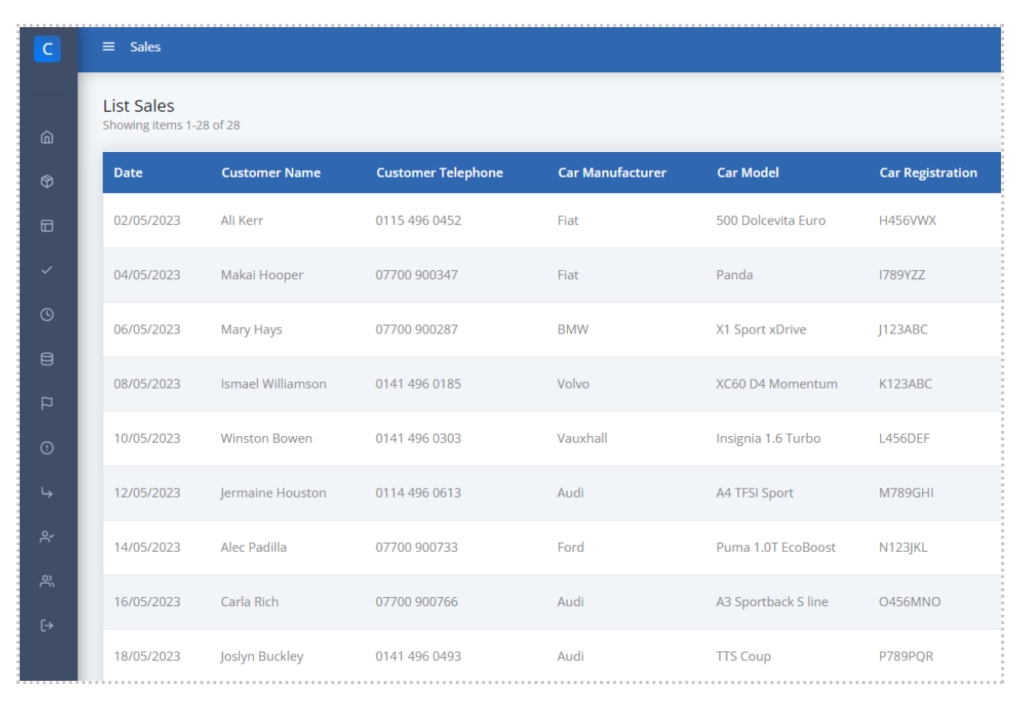
Content Type in Core
Then we started adding our new Sales to the database as we went along:
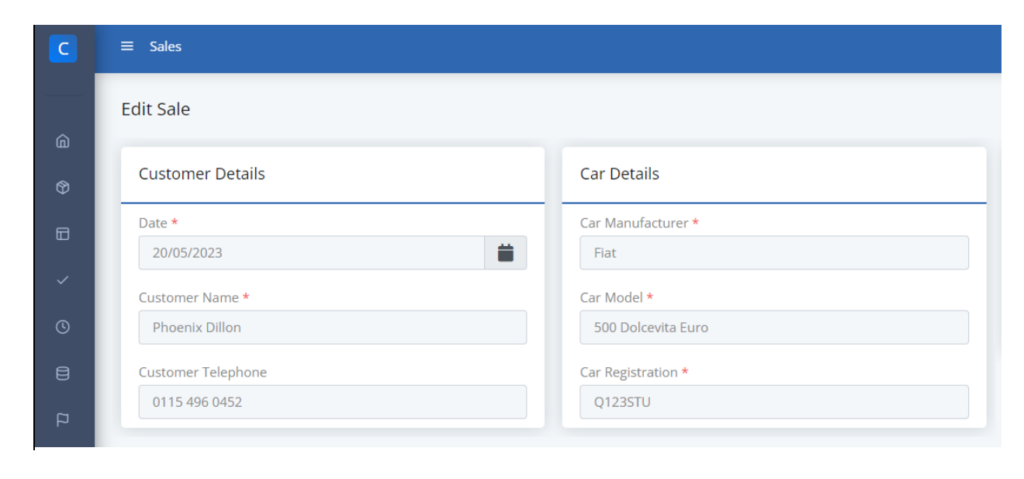
Core Content Type Example – Sales
Where we Want to Be
Now our business has grown, we are getting lots of repeat business and we want to restructure our data along the lines discussed in the previous blog post. In particular, we want to easily find all the sales for any given customer.
What We Need to Do
Instead of having a straightforward list of Sales, with each recording containing the full details of the Customer and the Car sold. We want to split those records into three separate Content Types:
- People
- Cars
- Sales
Core makes this process easy.
Step 1 – Export Our Sales Data to Excel
We use the built in Export feature to get all our Sales records into an Excel file:
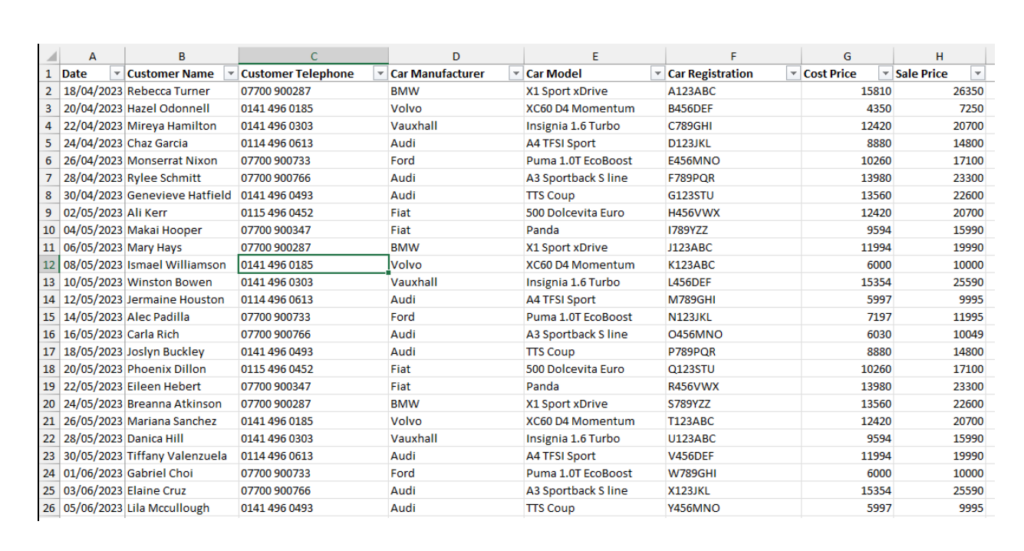
Export Our Sales Data to Excel
Step 2 – Create the New Content Types
Next, we make the new Content Types for People and Cars. We are going to keep these very simple for this example, we could easily add more detail if required.
Person
- Name
- Telephone
Car
- Manufacturer
- Model
- Registration
- Cost Price
One very important point here is to make sure you correctly choose a “Label Field” for each of the new Content Types. The label field should be one that identifies each unique record. In this case: The Name field for People and the Registration field for Cars. This will help us later to match up the records for the Sales to the correct People and Cars.
For details see the documentation: Content Types & Fields
Step 3 – Restructure the Data in Excel
Export the data for the newly created Content Types. As we haven’t entered any data yet, these will just be blank spreadsheets, but they will have the correct column headings that we need:
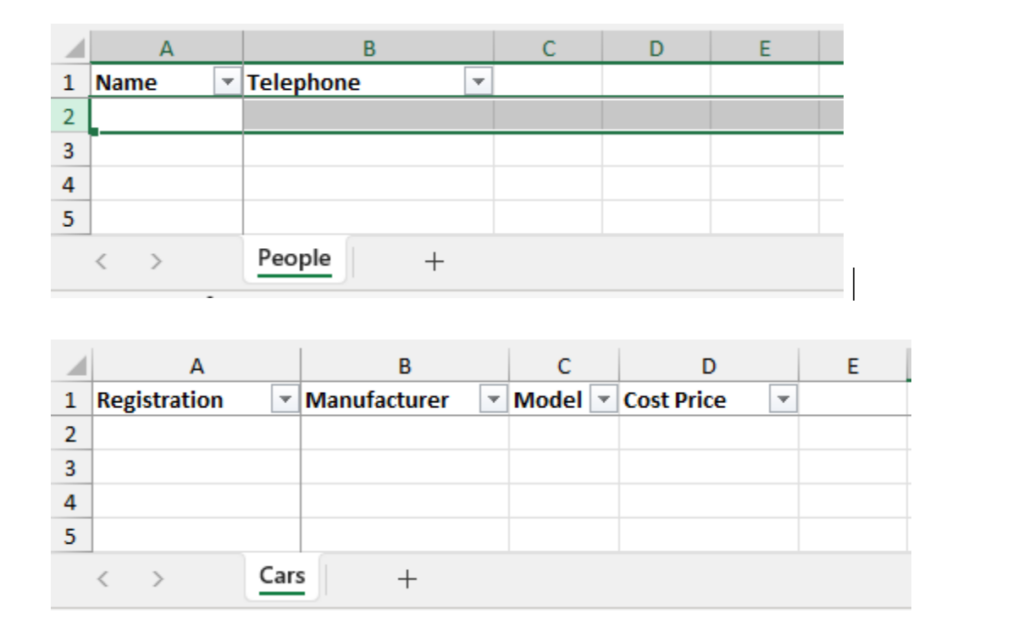
Restructure the Data in Excel
Then we can copy/paste the relevant fields from the Sales data we exported previously:
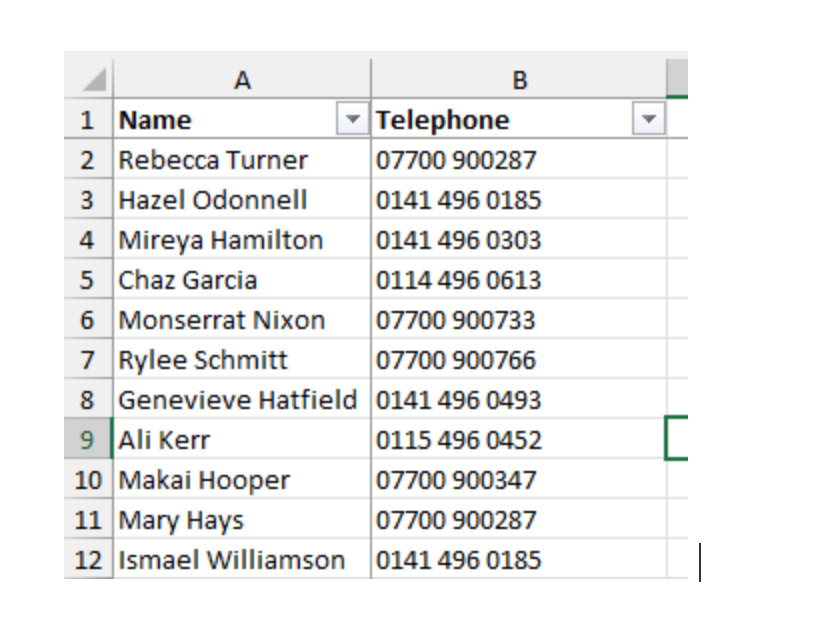
Sales data we exported
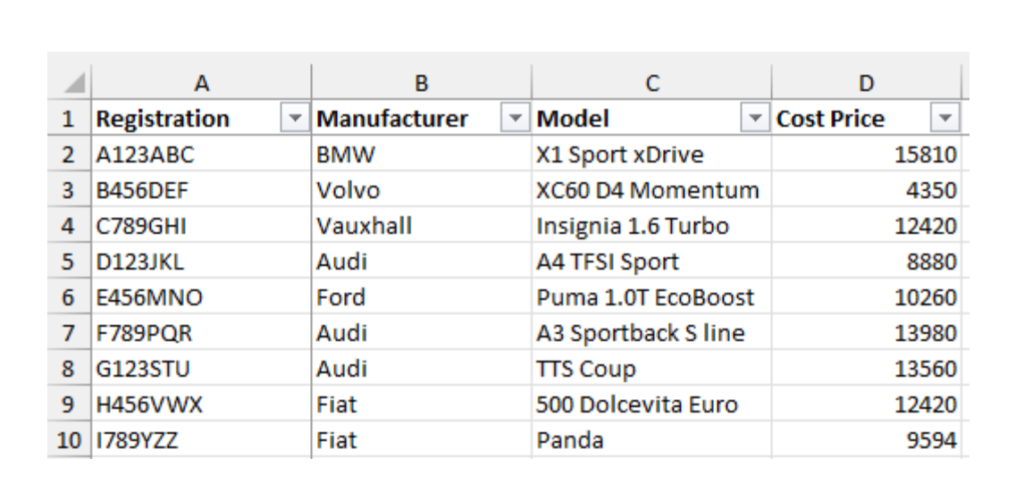
Sales data we exported
Then Import the updated spreadsheets into Core to populate the People and Cars:
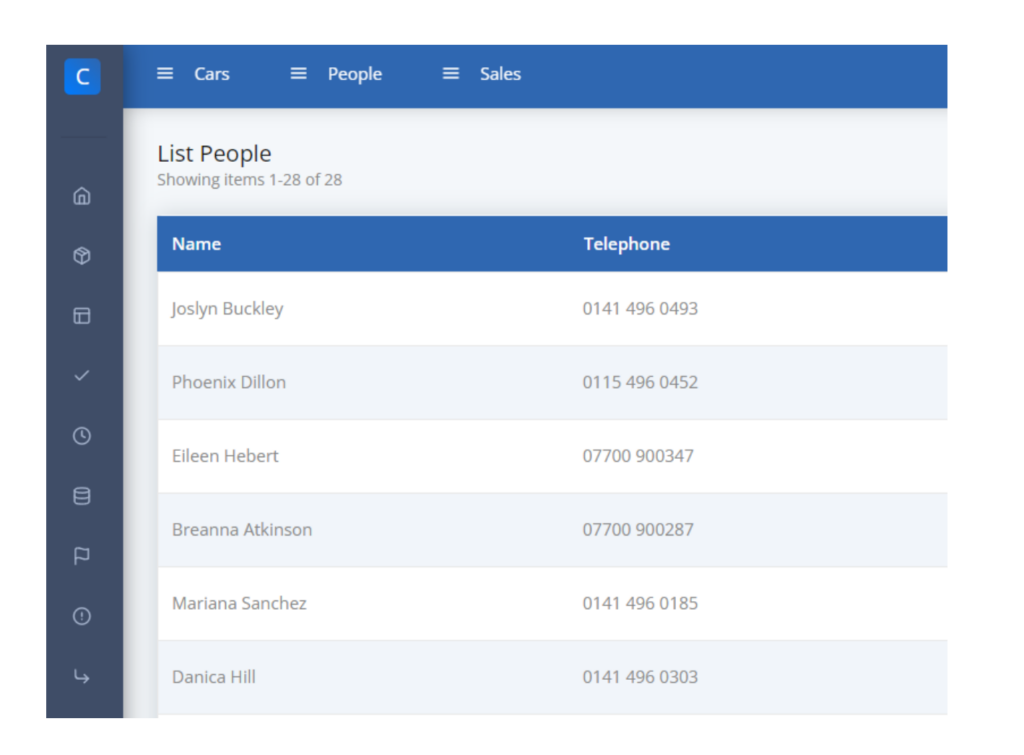
Example of CORE content type
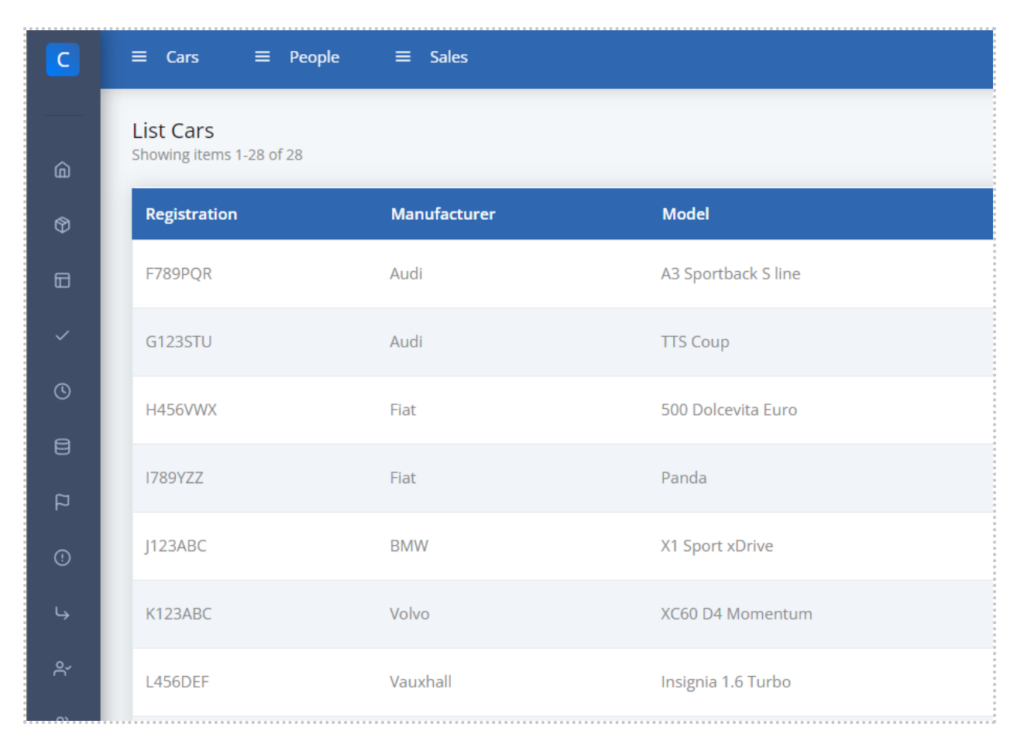
Example of CORE content type
Step 5 – Create the New Fields on the Sales Content Type
Now, we need to add the new fields to the Sales Content Type:
- Edit the Sales Content Type
- Add a Field for “Customer”
- Link it to Person Content Type
- Choose “Name” as the label field
- Make sure you select “Featured”
- Add a Field for “Car”
- Link it to Car Content Type
- Choose “Registration” as the label field
- Make sure you select “Featured”
Export the Sales data to Excel again. Now, you should see your new columns in the export, but they don’t have any data yet. If they don’t show up, edit the List view and make sure you tick the “Featured” option:
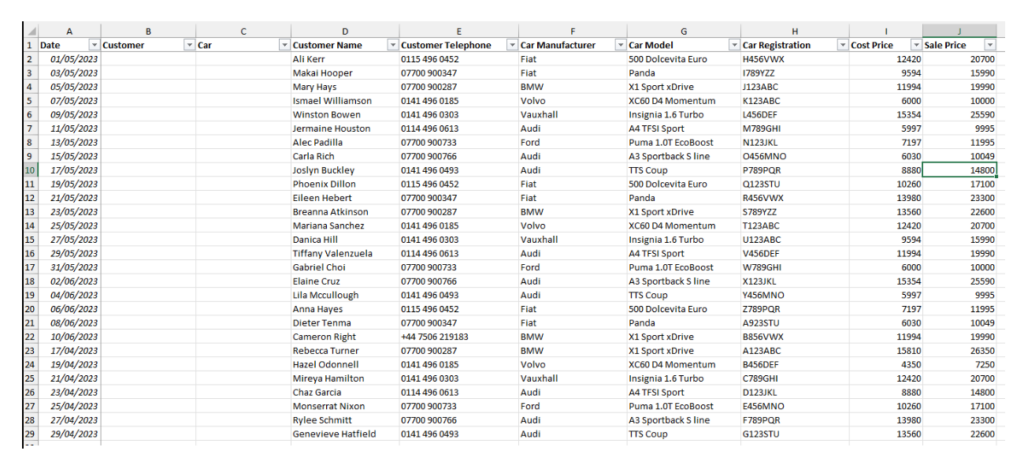
Imported data
Now, we can copy the Customer Name and Car Registration fields into the new columns:
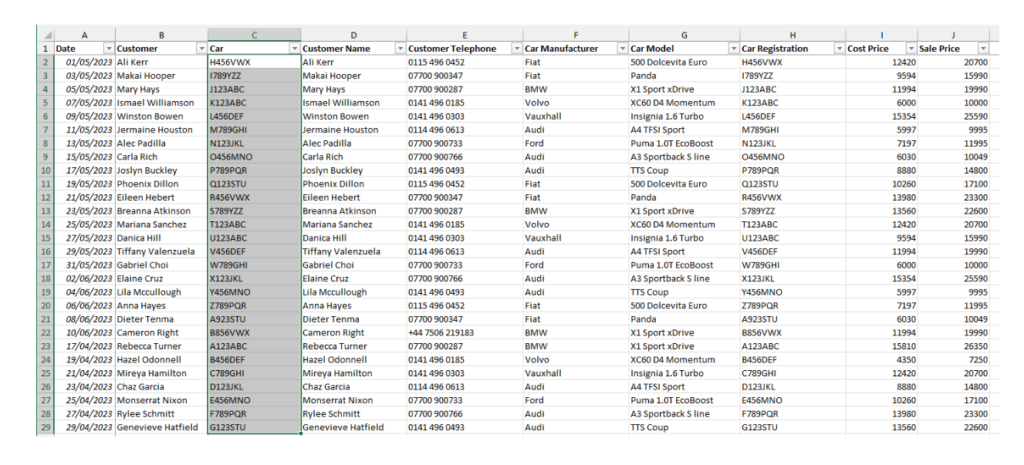
Imported data
And re-import the data … As long as we set the label fields correctly, Core will be able to match up the Sales records to the relevant People and Cars:
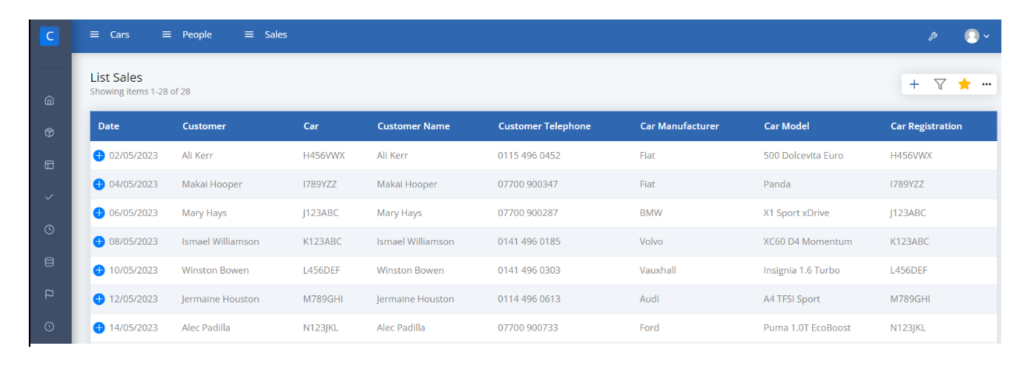
Example of CORE Content Type
Step 6 – Update the Layouts
First, we need to tidy up the layout for Sales:
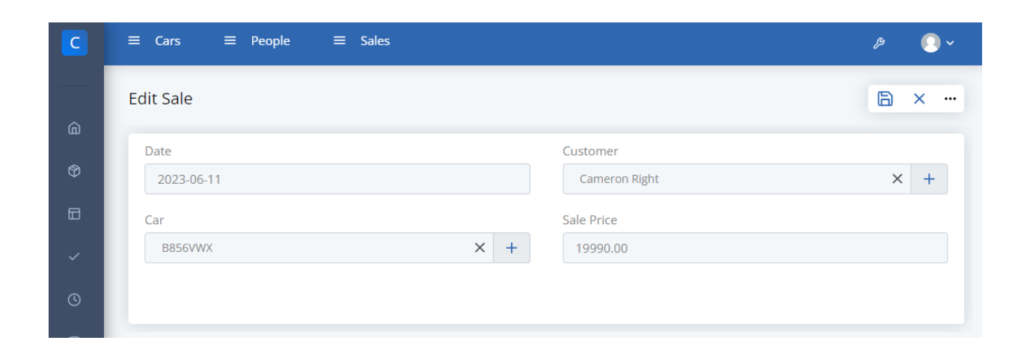
Update the Layouts
Notice that the Car and Customer fields are now drop-downs.
On the Person Content Type, we can enable “Related Content”. Now we can view any Person record and see a list of all the sales for that person:
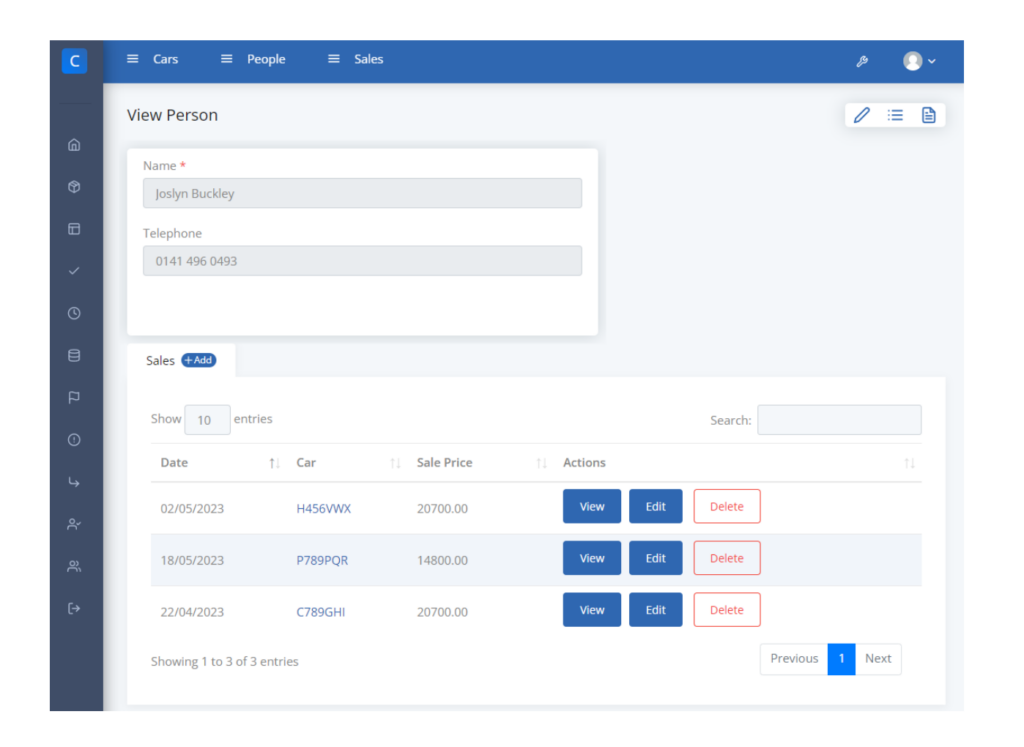
Update the Layouts
Summary
We have seen how to use the Excel Import/Export features in Core to help you restructure your data. We also have plenty more helpful documentation and videos available. If you would like to find out more give us a call on 0330 2020 101 or use the Contact Us form from our webpage.

